Pages

Tuesday 22 December 2015

Shotgun Game Model, Work in Progress.

Building on the experience I had creating my Flintlock Pistol game assets I took some time off from my game design project to make some more assets for an Evil Dead inspired scene. At the moment I'm working on a shotgun, chainsaw, and a 3D version of Ash. I just thought I'd share an image of my work in progress on the shotgun.


Obviously there's still a ways to go but I've finished the base mesh in 3DS Max and I'm currently working on the fine details in Zbrush. I'll then bake the lighting information from the high poly mesh to the low poly mesh's UVs and create the materials in Quixel. Once I've used this model in my own projects I intended to sell it on either the Unreal marketplace or Turbo Squid.

Thursday 12 November 2015

Evil Dead pixel art.

I've been practicing my pixel artwork with a concept piece in the style of a 16bit game, inspired by the Evil Dead films and my recent viewing of the Ash Vs Evil Dead series. My software of choice to work with was Pyxel Edit a great program designed specifically for creating pixel art and animations.

I began by creating a simple tileset to be used within a game engine such as GameMaker or Unity.


Pyxel Edit helps to create symmetrical tilesets with ease that snap together without seams.


I also created a few assets for the environment and UI elements.


My main character is heavily inspired by Bruce Campbell's character, Ash from the Evil Dead, complete with a chainsaw attachment in place of his hand. He's a little more buff after years of slaying Deadites!


I'm currently working on a few animations such as a walk cycle, and attack animations, but I'm pleased with the progress so far. Pyxel Edit is great for previewing animations as you work and has helped speed up the process compared to Photoshop.


I produced a quick mock-up of how all the elements would look in-game, complete with UI elements and a parallax scrolling background.

I'll continue to work on this project in my spare time and I hope to have a working demo soon!

Thursday 15 October 2015

Gentleman's Flintlock Pistol, Turntable Render

I wasn't happy with how I'd left the Gentleman's Flintlock Pistol. After a little break I've gone back and added a bit more detail to it before creating a turntable render for my portfolio. I think it's been worth it, and finding out how to add multiple light sources in Marmoset Toolbag has really taken the lighting to the next level. Check out the results below.


Wednesday 30 September 2015

Game Character clothing.

I've been working on the clothing for my game characters. I took the opportunity to learn Marvelous Designer to help speed up my workflow. I found it pretty intuitive and it helped to create the realistic folds in the different materials I wanted for my character.


Early attempts were pretty basic.


The software was easy to get to grips with and once I'd manipulated the folds and adjusted the material parameters I was happy with the results. I'm still working on the overcoat and a few accessories, but my character is looking very dashing so far, if a little bald! 


I took the mesh into Zbrush to model the embroidery on the waistcoat. I used the character research and designs I created earlier in development to help me.


I created a quick turntable render in max of the high poly mesh. I'm pleased with the results achieved whilst experimenting with Mental-Ray materials and a few patterns from my own texture library. It should be easy to recreate the look once I redo the topology of the model, bake out the maps, and make the customised PBR shaders for UE4.

Friday 18 September 2015

NASA Tournament Labs Modelling Competition.

So I entered a modelling competition, set up by NASA, to create precision 3D models for use in their EVA simulations, to calculate the movements of the robotic arm aboard the ISS. You can find the competition here. Out of hundreds of entries and ninety-one finalists I came fourth in the first competition...not bad!

 I was praised for the quality of my work which was thanks enough, but congratulations go to the winner, and I can see where he went above and beyond in terms presentation of his work. I really should've done an exploded render of my model to show all the different elements separately. Anyway, here are the images I created.


Saturday 29 August 2015

Game character, weapon renders.

I've redone this models topology, baked out the maps, and I've just finished the textures in Quixel. Here's some of my latest renders. I created this weapon to be the perfect counter point to the Bayonet Flintlock Pistol I created for the games other main character (see earlier in the blog here) and I think that shows in the craftsmanship of this one.


Thursday 16 April 2015

Texturing a character's head

I really wanted to cover texture creation in Zbrush, to paint my character heads. I sourced a number of useful skin textures, and facial photographic reference, then imported them into Zbrush. Loading the textures into the Spotlight tool overlays them on top of the model in the viewport. By transforming (scale, rotate, move) both the image and the underlying model it is possible to line up the image with the geometry below. Using a brush tool and painting over the texture projects the colour information onto the model.


I continued to paint each major facial structure, moving the image when necessary to achieve the best fit for my model. To fill any areas of back facing geometry I used a colour spray brush to sample the nearest colour to the unpainted area.


Using different textures can lead to a mosaic effect due to the variation of lighting and skin tones in the images. I used the clone and smudge tools to subtly blend these border areas together.


  The final head looks impressively realistic.

Saturday 4 April 2015

Gentleman's Flintlock Pistol base mesh

I've begun working on the 'Gentlemans' weapon asset. I wanted this one to be more elegant and refined compared to the 'Bandit's' weapon. I created this in 3DS Max and Zbrush but I still need to work on the textures.


Saturday 28 March 2015

Gentleman Character Sculpt

After creating the Bandit head I began sculpting the head for the Gentleman. I applied the same process but followed the reference imagery for this particular character. I had designed the Gentleman to have sharper features than the more rounded nature of the Bandit’s head, and that is reflected in the basic shape of the initial sculpt.


Continuing with the sculpt I concentrated on the underlying skull of the character. He has prominent cheek bones but a less pronounced brow. The ears were created by masking and extruding the geometry in the same way as the Bandit sculpt.


By creating the muscle structure that flows around the mouth and into the bottom lip (the depressor Angil Oris and the Depressor Labil Inferioris) it gives a more natural appearance. The lips are then pronounced by creasing the border and slightly inflating them. Modelling the inner ear structure required studying photographic reference and then translating the volumes to the 3D sculpt. Breaking down the forms I carved in an ‘S’ shape, deeper at the base than at the top, then the branching structure of the ‘Anti Helix’ was built back up with the clay brush.


To finish volume was built up from the cheeks onto the sides of the nose to form the Nasalis facial muscle, the Philtrum was indented, and the nostrils defined.

There is still some sculpting that could be done to take this model to the next level. Wrinkles, skin pores, and breaking up the symmetry will further enhance the realistic appearance of the model.

Sunday 15 March 2015

Bandit Character Sculpt

Zbrush is another essential piece of software in a 3D artist’s toolkit. It breaks away from the traditional modelling techniques of programs such as 3DS Max or Maya.It is often referred to as working with ‘digital clay’ and simulates the more 
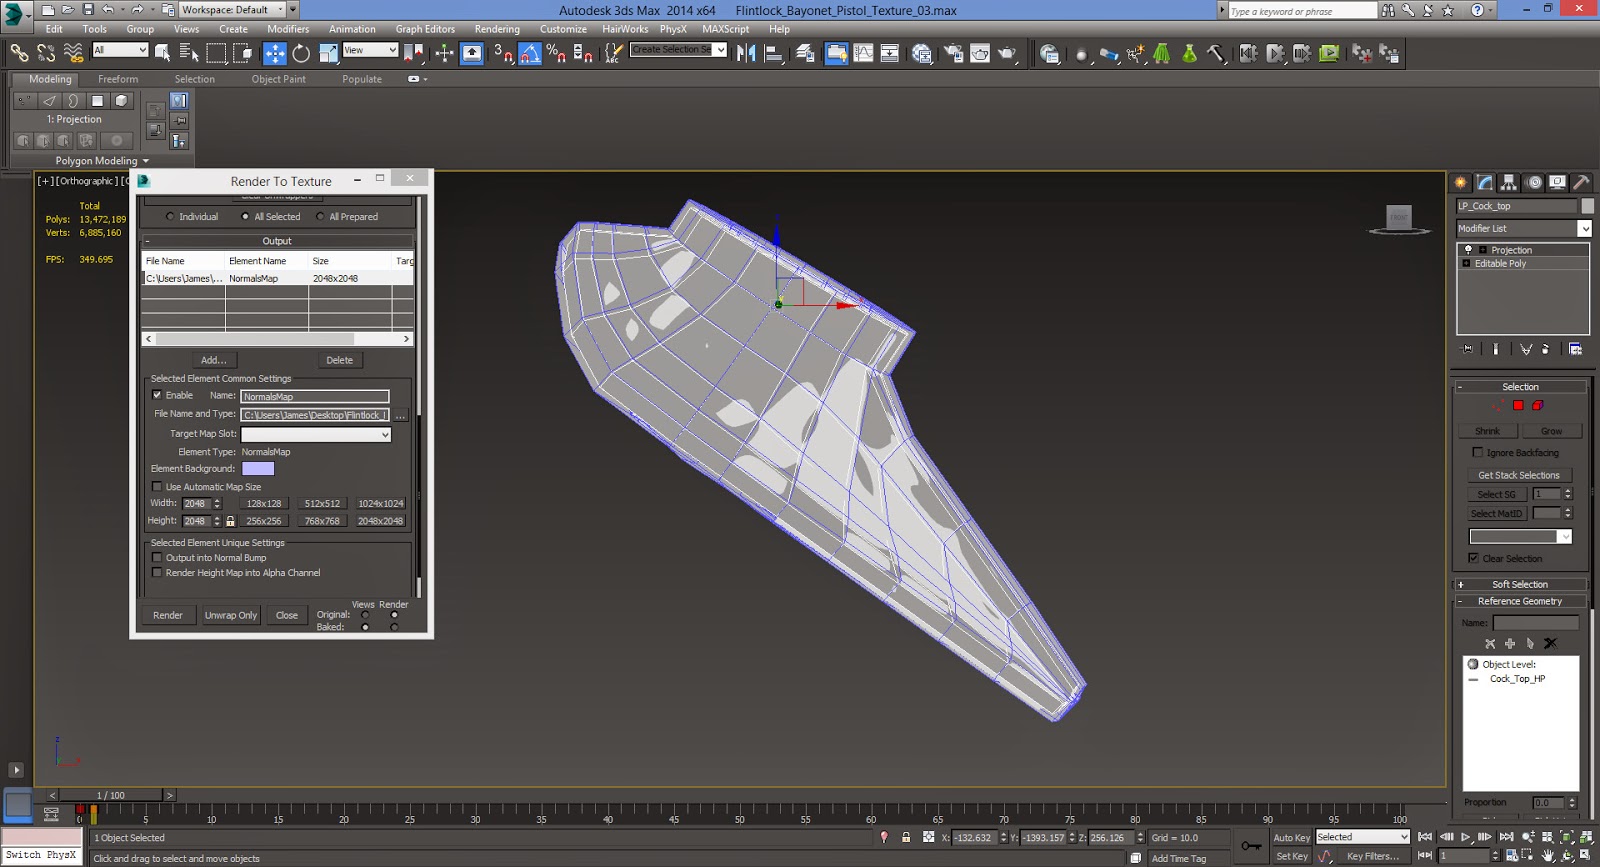
organic process of sculpture. I had used it to create the fine details of my pistol models, but needed to become more familiar with the software in relation to character creation. This process also requires an understanding of anatomical structures that I have been studying to become a better artist, but practice is essential to achieve realistic results.

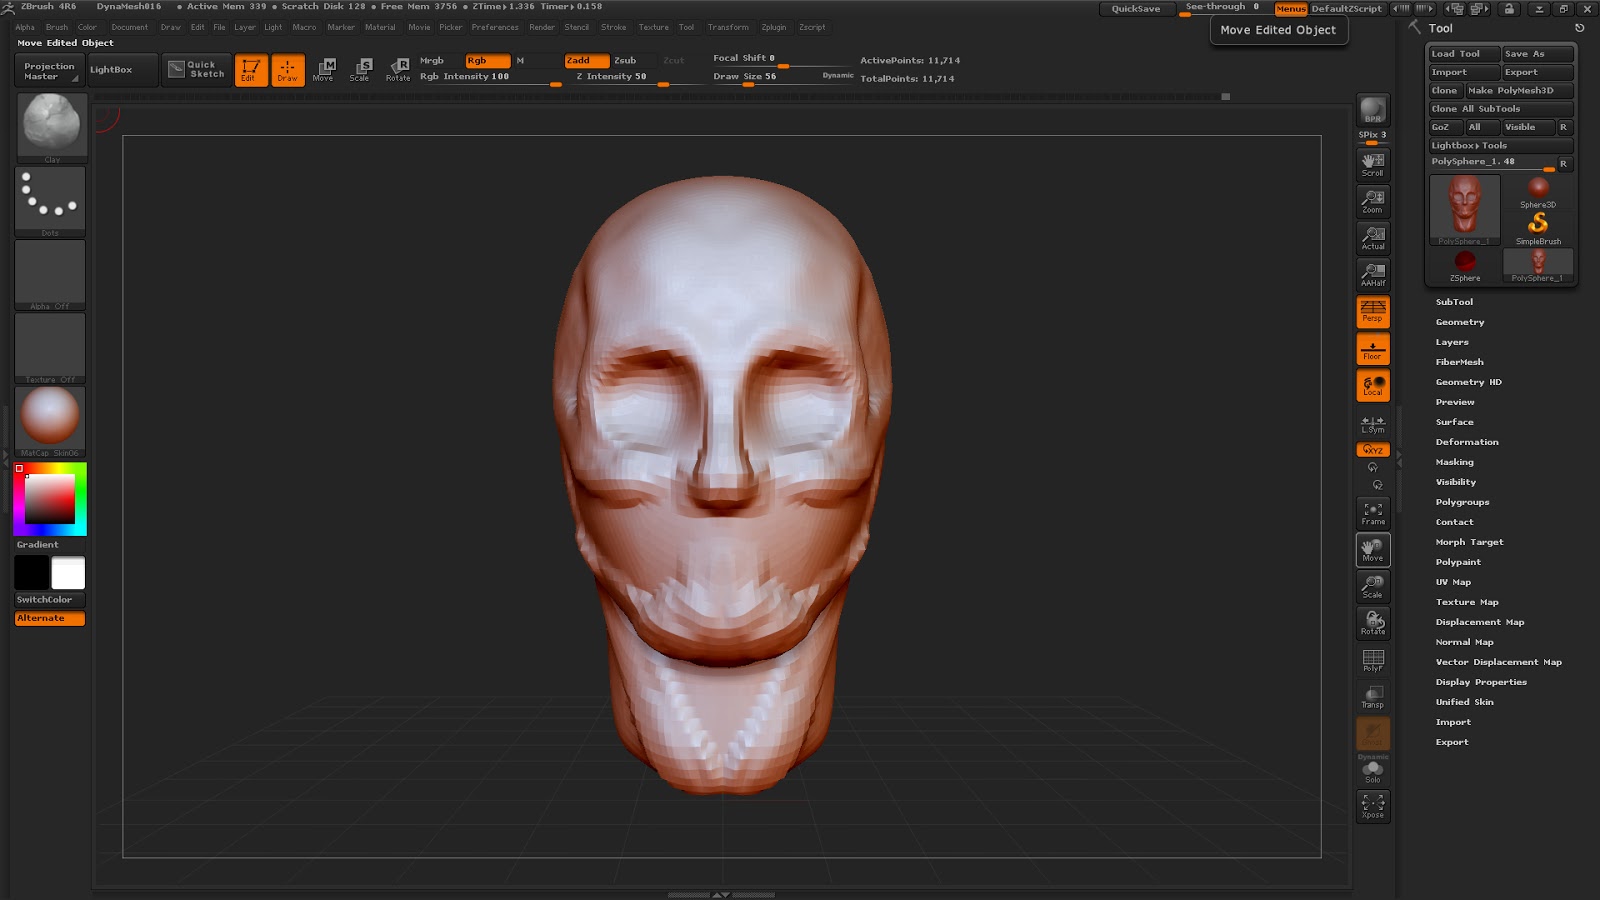
Starting with a simple sphere I extruded a neck and shaped the head using my reference and concept sketches for my characters. I began building up volumes such as the jaw, cheek bones, nose, and eye sockets with the clay brush. At this stage it is important to establish the underlying skull structure rather than focusing on the details. Constantly building and then smoothing the forms prevents the geometry from becoming too stretched.


Once all the major structures of the face are defined the geometry is then subdivided to work on finer details. A cavity was created for the mouth and the edges pinched together to form the lips. I also gave the character a prominent brow to give him a menacing, thuggish look.


The eyes were created from spheres appended to the head. A circle was masked off and indented to create the iris, then the mask shrunk and the selection extruded to create the pupil. To create the ears a ‘C’ shape was masked off for the base, then the geometry was extruded and moved to form a basic ear shape. One of the most difficult parts of the model was creating the puffy skin in which the eye lid tucks into. The eyelid was created first by masking and then moving the geometry over the eye. Then the area above the eye lid was masked and then pulled over the eyelid.


I experimented creating hair for this character using fibermesh. It was my first time using this tool so this isn't the final model, but I'm pleased with the progress so far.


Monday 2 March 2015

Unreal hats!

I'm taking some time out of my game development to create some assets for the new Unreal Marketplace.
Player accessories are big business and more platforms/games are coming bundled with a store front to sell user created content. With my current skillset and experience with the Unreal Engine it was the perfect time to get in on the ground floor of a new market.

 To fit with the entry requirements and after a little research I opted to do a homage to the Jason character from the 'Friday the 13th' franchise. Using a default character for scale I created a basic mask in 3DS Max.


I took this into Zbrush to add fine details like cracks and scratches.


I then baked the texture maps from the high poly model to the low poly mesh in 3DS Max, for use in Quixel.


I'm pleased with the final mesh, and it's been submitted for approval on the Unreal Forums. I hope to make more assets to sell on the marketplace as it's only going to grow.


Finished textured model.


A wireframe render to show the low poly mesh.

Friday 20 February 2015

Bandit Flintlock Pistol Renders

To finish my pistol model I created some renders that will be used as concept art for promoting my game, and to enhance my personal portfolio. Camera effects such as depth of field, lens flare, dust, and ISO grime,  give the image a sense of realism whilst softening the stark digital nature inherent in 3D imagery.


I'm really pleased with the final images, a lot of work went into this asset but it shows in the finished product. It also helped me to practice the high-low poly workflow I learnt last year, and whilst I may have taken slightly longer on this than the revolver I created, this model is much more detailed. I intend for all my future assets to meet the high standards established whilst making this one.

Friday 13 February 2015

Texture creation in Quixel

After baking out all the required maps they were plugged into Quixel alongside the low poly version of my gun model. Quixel uses the colours on the Colour ID map as a mask to assign different materials to the texture map. I also set up Quixel to generate materials for use in UE4, the target platform for my game.

Testing the creation of the barrel texture in Quixel.

To enhance the basic materials I added weathering and dirt effects such as the tarnish on brass elements, edge wear, and even a blood splatter on the bayonette. These details are applied in Quixel using the normal and cavity maps which mask off cavities and edges.

 The maps plugged into Quixel on startup tell the program which areas to mask.

The fine details sculpted in Zbrush are really enhanced by adding dust and ingrained grime to them. This weathering also gives the final texture a realistic 'lived in' look.

Finishing the handle in Quixel. A weathered effect on the grip gives an aged/used appearance to the model.

I continued to work on the pistol making sure the level of detail on each element was consistent. The preview window in Photoshop gives great feedback on how the finished model will look in UE4.

Finalising the model in Quixel.

Once I was happy with the results the maps were baked out for use in UE4. Quixel saves a lot of time creating fine details that would have previously been done by hand. I'd used this workflow before to create a revolver but I wanted to perfect it through practice and repetition, and this project (as well as being a viable game idea) was designed to give me that opportunity.

The final texture maps exported from Quixel for use in UE4.

Friday 6 February 2015

Baking texture maps in 3DS Max

Once all the pieces were sculpted in Zbrush I imported them back into 3DS max. Some elements needed to be completely retopologised, where others I used an optimised version from the low poly base mesh. The UV's of each mesh were then flattened, and I ran test bakes to make sure the projection cage would capture protruding details and how much the cage would need to be modified to do so.

A screenshot of the low poly 'hammer top' with a projection modifier to capture the details of the high poly mesh underneath.

When the low poly topology was done I separated each piece with its high poly counterpart along the animation timeline. This is to prevent shadow artifacts when baking out the ambient occlusion maps, as well as signifying which piece has been completed. Each element was also assigned a unique colour to represent the different materials of the final model. This will be used to bake a colour ID map for texturing in Quixel.


All the parts of the high poly mesh 'exploded' on the animation timeline, and assigned colours based on the materials of the finished design.

At the end all the pieces were combined as one mesh and a Normal, AO, and Colour ID map baked to texture. Finally I used the Normal map to generate a Cavity Map in nDo. These four maps as well as the low poly pistol will be used to create the textures in Quixel.

The final texture maps baked from 3DS Max for use in Quixel.

Sunday 1 February 2015

Sculpting fine details in Zbrush

Once I'd created the base mesh for my Flintlock pistol I exported each element into Zbrush to work on the details. Sculpting details such as the wood texture, and grip on the pistol handle should really enhance the finished model.

A screenshot of the pistol handle being worked on in Zbrush.

The metal elements such as the lock side plate required some filigree detailing created using custom alphas. Once each piece was finished I used Decimation Master to optimise the mesh for use in 3DS Max.

A screenshot showing the sculpted details of the side plate for my game asset.